How To Make Boat Water Drinkable
Ask any ten boaters what they think of their onboard freshwater quality and at least half of them will admit to not using it for drinking purposes. Yet keeping onboard water supplies good tasting and drinkable isn’t rocket science (although some components may be traced to the Space Program). Our old friend Capt. Pauley has offered to fill us in on how to keep out boat water tasty.
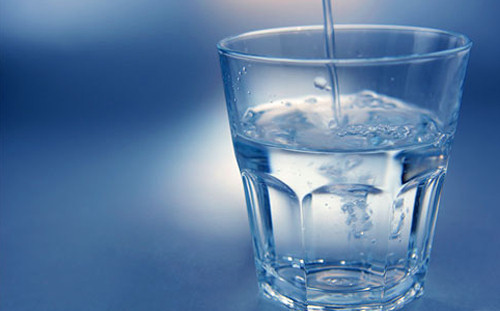 On many boats the water looks good out of the tap -- until you taste it! |
Reprinted from Capt. Pauley's Virtual Boatyard...
 |
Water system problems manifest themselves in several ways. Aesthetics, where the water either looks bad, tastes bad, smells bad or any combination of the three. On the other hand, the water could be contaminated with bacteria, cysts or chemicals. Since water comes to the boat tanks from any number of sources, keeping the water safe and drinkable requires some common sense, some equipment and some dedication of time and effort on an ongoing basis.
First Step
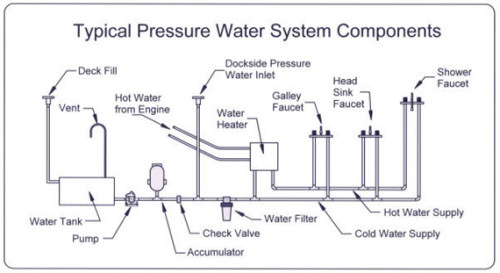
The first step in securing your water supply is to take care of the infrastructure, the tanks, hoses, pumps and other accessories. Often water sits in a boats tank for long periods. Even the purest water eventually becomes home to slime and algae.
The tank can also build up deposits of things like dirt, rust flakes and paint chips. The tanks must be flushed as well as possible. If you have access plates in your tanks, open them up and flush out the tank interior. A last resort would be to pull the tank out and steam clean it. Then flush it out with plenty of fresh, clean water,
Evil-Looking Crud
In doing this in my boat, I discovered that a prime source for some of the bad taste and evil looking crud in the water wasn’t coming from the tanks; it was coming from the water lines themselves. In my case, the normally clear PVC hoses were either black or opaque from the build up and deposits. I couldn’t get them clean so ended up replacing all the water lines with new ones.
Water heaters, pumps, accumulator tanks and faucets can also harbor growths and deposits and will need flushed out or disassembled and cleaned. While doing this, check the tightness and integrity of the hose clamps and check for any other leaks. It goes without saying that you should have the service instructions as well as back up spares for all your pumps and filters aboard.
Cleaning the really dirty tanks
Water tanks that haven’t been properly cleaned in a long while can build up a thick or stubborn layer of crud in the bottom. While taking the tank out of the boat and steam-cleaning works well, it isn’t always practical. For those tough cases, you might try this process:
If you have an access plate in the top of your tank, or can add one, dump several inches of ice cubes in the empty tank. Add a little water to allow the ice to slide around in the tank. Be careful not to add enough water to allow the ice to float off the bottom of the tank. Take the boat out on a day with some wave action and let the ice slosh back and forth in the tank. The ice cubes should scour the bottom of the tank before melting. Flush the tank until the sediment clears. If you have filters in your water system, remove the elements before flushing, as they will soon clog. Do the flushing with good water or you will have to do the sanitizing all over again
Sanitizing
With the tanks, lines and accessories flushed and cleaned as much as possible, the next step is to sanitize or “shock” the water system. Note I said “system”; it doesn’t do any good to sanitize the tanks and not the lines, pumps and everything else.
The system is “shocked” by filling the tanks and adding household bleach to the tanks, at the rate of 8-ounces for every ten gallons of water.
This concentration of bleach is for sanitizing only, not drinking!
Once the bleach is in the tanks, pressurize the water system and let water drain from each outlet (faucet, shower, etc.) until the water smells of bleach. Turn off all the outlets but leave the system pressurized. This will ensure that the bleach/water mix stays in the lines and pumps so they too can be sanitized.
Leave the system pressurized at least 8 hours but no longer than 24 hours. At the end of this soak time, the water system is again flushed until the bleach/water is gone. Be sure to run each faucet or outlet, starting with the one furthest from the pump. This process is safe for aluminum tanks as long as it is done for the suggested time and not more than once or twice a year.
Ongoing
At this point, the water system has been cleaned and sanitized. The water used to fill your tanks on a regular basis can come from outside the boat, through dockside or other water supplies or from an onboard water maker. With the watermaker, you’re home free as this water is pure and sterile.
However, the water coming aboard from outside is questionable. There are several things to be done before filling from an outside source. First, make sure that the O-ring in your deck water fill cap is in good condition. It does no good to clean your tanks and then have outside water leak in from the very decks those seagulls roosted on.
Make sure the hose you fill your tanks from is rated by the FDA for potable water use. Let the water run through the hose for enough time to flush out the hose itself. A hose filled with water, sitting in the sun, can play host to all kinds of growth. Better yet, bring your own hose and make sure it is emptied out after each use.
While the hose is running, look at the water. If it looks dirty or discolored, pass on filling the tanks here. You can’t spot contaminants like bacteria, metals or cysts, but if it looks bad why take a chance.
One of the keys to good water aboard ship is to use it. Keep the water flowing in and out of the water system on a regular basis. That will help flush out the system and get rid of water before it has a chance to become stale.
Filtering and Sterilizing
Lacking a watermaker or proven safe outside water supply, you must take steps aboard to ensure water quality. This can be done with filters and/or sterilizers.
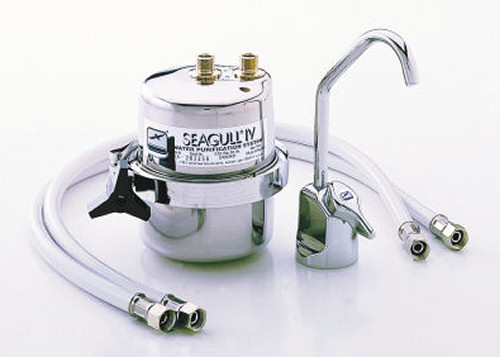 |
Look for a filter that meets the EPA Microbiological Purification Standards. These will eliminate bacteria, virus or cysts from the water. This type of filter may need to be preceded by another filter to keep larger size particles from the sub-micron filter media.
Another option is to add a Ultra-Violet water sterilizer to the water system. Water passing through these units is sterilized by a UV lamp. Ultraviolet irradiation is now accepted by both the EPA and the FDA as a safe, effective method of bacteria control. These also benefit from another particulate filter in the system to remove the remainder of the contaminants.
 |
Chemicals and Treatments
A look at the shelves in your local marine store will reveal several products aimed at cleaning and sterilizing water tanks. Pay close attention to what the box or label says. Many of these products only attack the taste and smell issues. They do an excellent job of that but they don’t document what sterilizing powers they have.
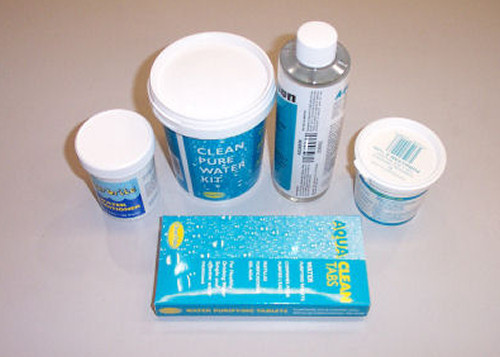 |
A better solution for making questionable water safe to drink can be found at camping and RV stores. There you will find both chlorine and iodine based sterilizing products along with better instructions for safe use.
You can also use household bleach to make questionable water safe to drink. Add 1/2 teaspoon of bleach for every five gallons of clear water. If the water is cloudy, increase the bleach to 1 teaspoon for every five gallons of water. Let the water sit in the tanks for at least 30 minutes if clear or 60 minutes if cloudy.
Testing
The only positive way of determining water quality is by having the water tested. Most local health departments or Cooperative Extension Offices can give you a list of local labs that will test your water.
This test would only be valid for the water in your tanks and the state of the water system when the test was made. Subsequent fillings leave you in doubt. However, there are now home water testing kits available. These tests are not quite as accurate as the ones done in a certified lab, but they will indicate if there might be a problem.
Finally
Keeping your onboard water supply safe and good tasting isn’t rocket science but does take some effort. Keep at it and your morning coffee will thank you.