Battery Charger Selection and Installation
Maintaining your batteries is crucial, both for performance and increased service life. Keeping them properly charged can be an issue however, particularly for vessels that see limited or sporadic use. A great way to monitor and promote good battery health is by installing a modern “smart” battery charger. Here’s a look at the basics, from selection to installation.
Choosing a Charger
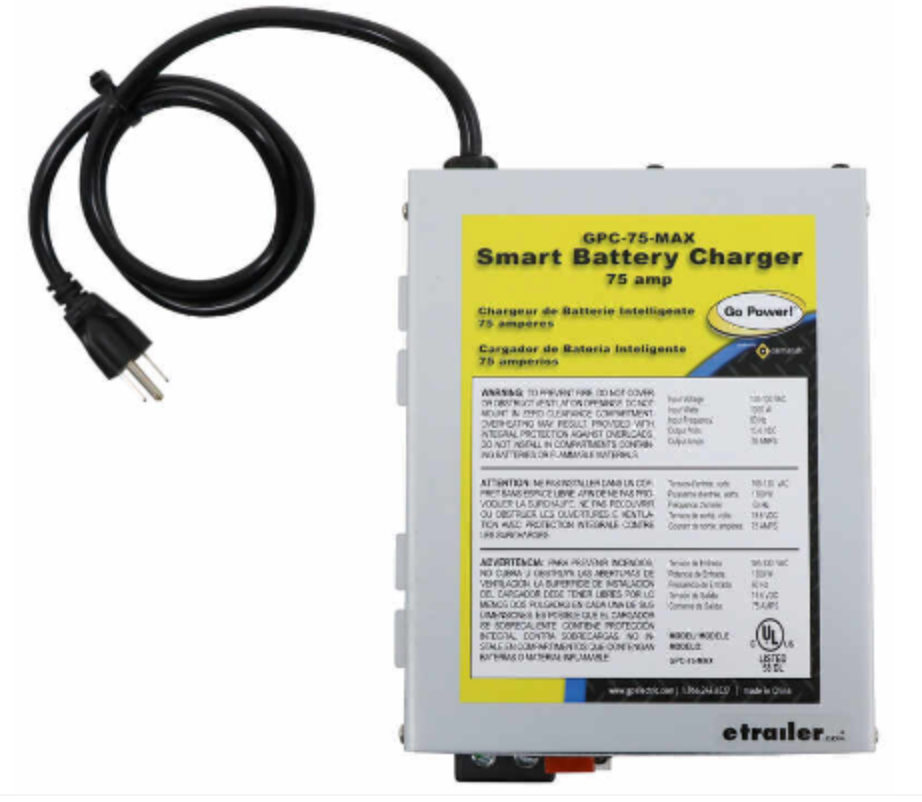
Marine-grade batteries aren’t cheap and can easily be destroyed by improper charging, meaning the last place to skimp is during charger selection. Always go with a good quality marine grade unit, one built to ABYC (American Boat And Yacht) and UL standards. Look for smart chargers that provide numerous charging options and features, such as the ability to select between the different types of battery technologies, i.e. wet cell, AGM (Absorbed Glass Matt) or Gel.
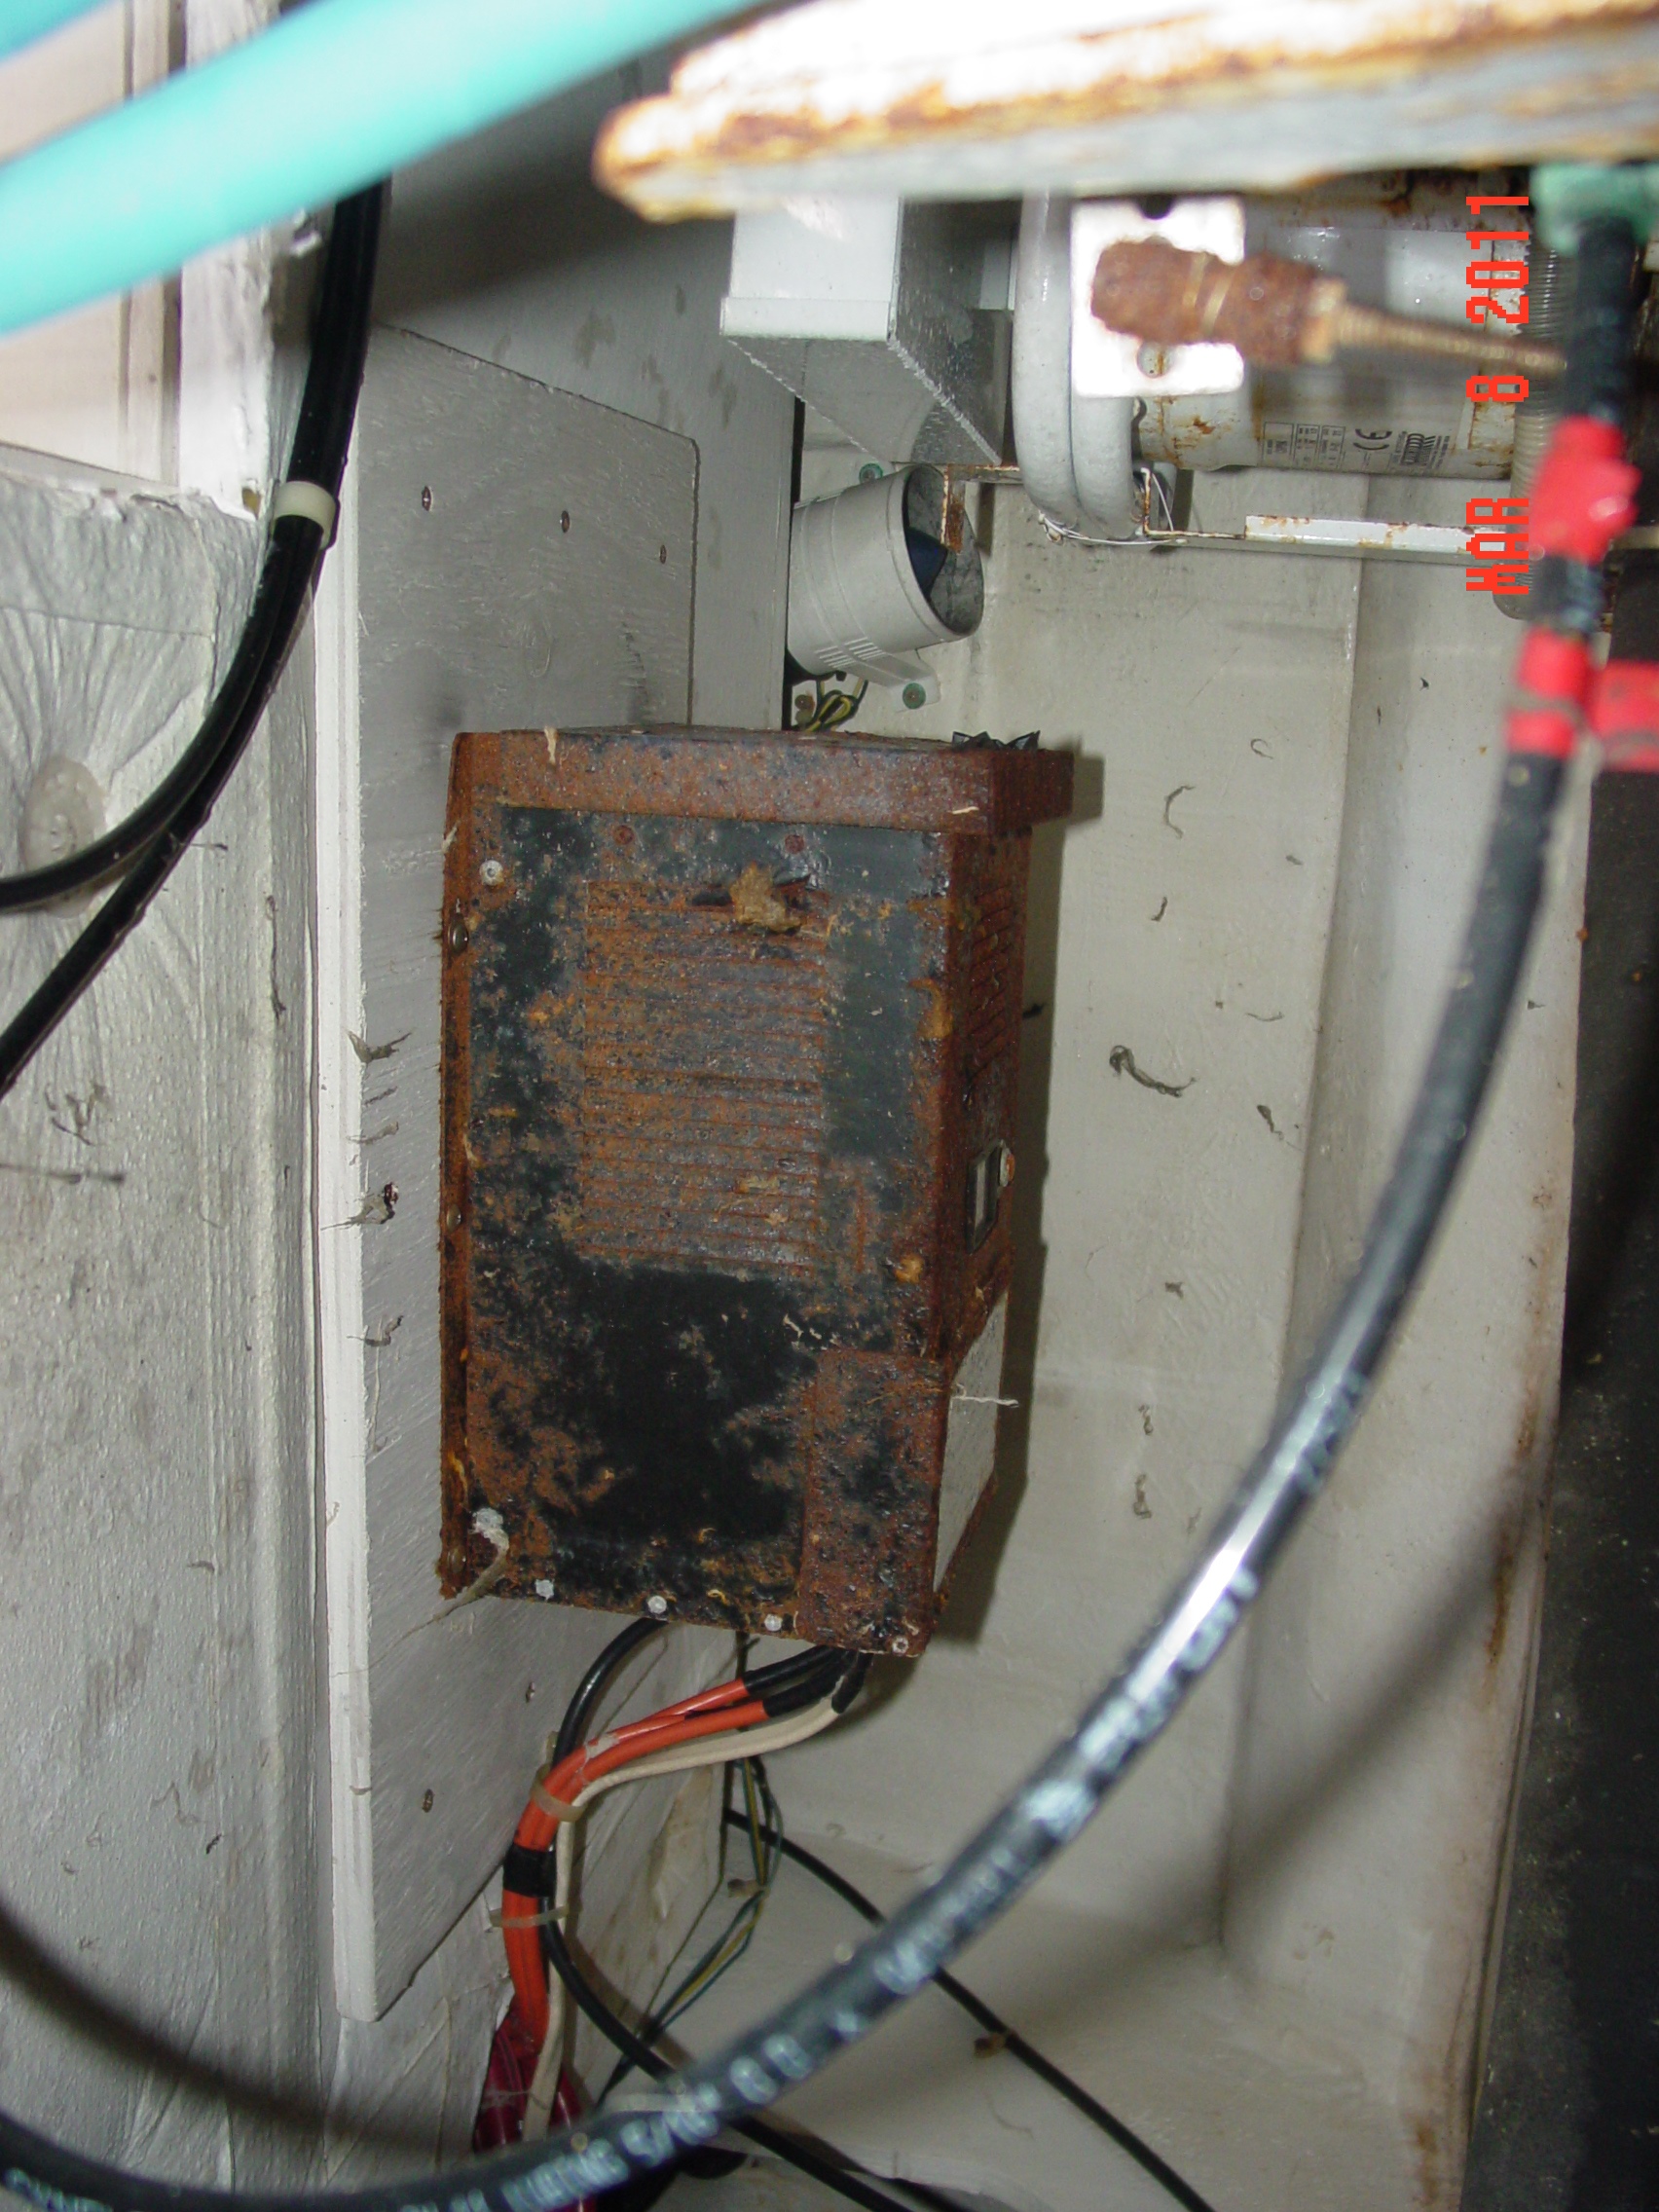
Unlike those old resonance battery chargers have used in the past (the ones that hum like something out of a mad scientist’s laboratory) most modern chargers are “fully potted,” a term that means their electronics are encapsulated in resin. This not only makes the unit waterproof, it significantly reduces the chance of corrosion.
Waterproof chargers can be used on any craft, but are particularly useful for installations aboard boats that are often wet by nature (such as personal watercraft and small fishing boats). As uncontrolled combustion is not our friend, battery chargers installed on gasoline powered vessels must be labeled as being ignition-protected and conform to appropriate UL specifications, which includes testing in an explosive environment.

Regardless of the battery charger chosen, stay away from those el cheapo automotive chargers down at the local S-Mart. They’re not designed for marine use and can cause a multitude of problems from stray current corrosion to shock hazards.
As to size and output, consult the manufacturer’s instructions when selecting a charger, but a general rule of thumb is to choose one with an output that’s at least 10% of a boat’s battery (or battery bank) capacity. For example, if it has a 300Ah (amp hour) battery or bank, choose a 30-amp charger. If an exact match based on the above can’t be made, a charger with a little more output is a better than one that’s too wimpy.
Choosing a Location
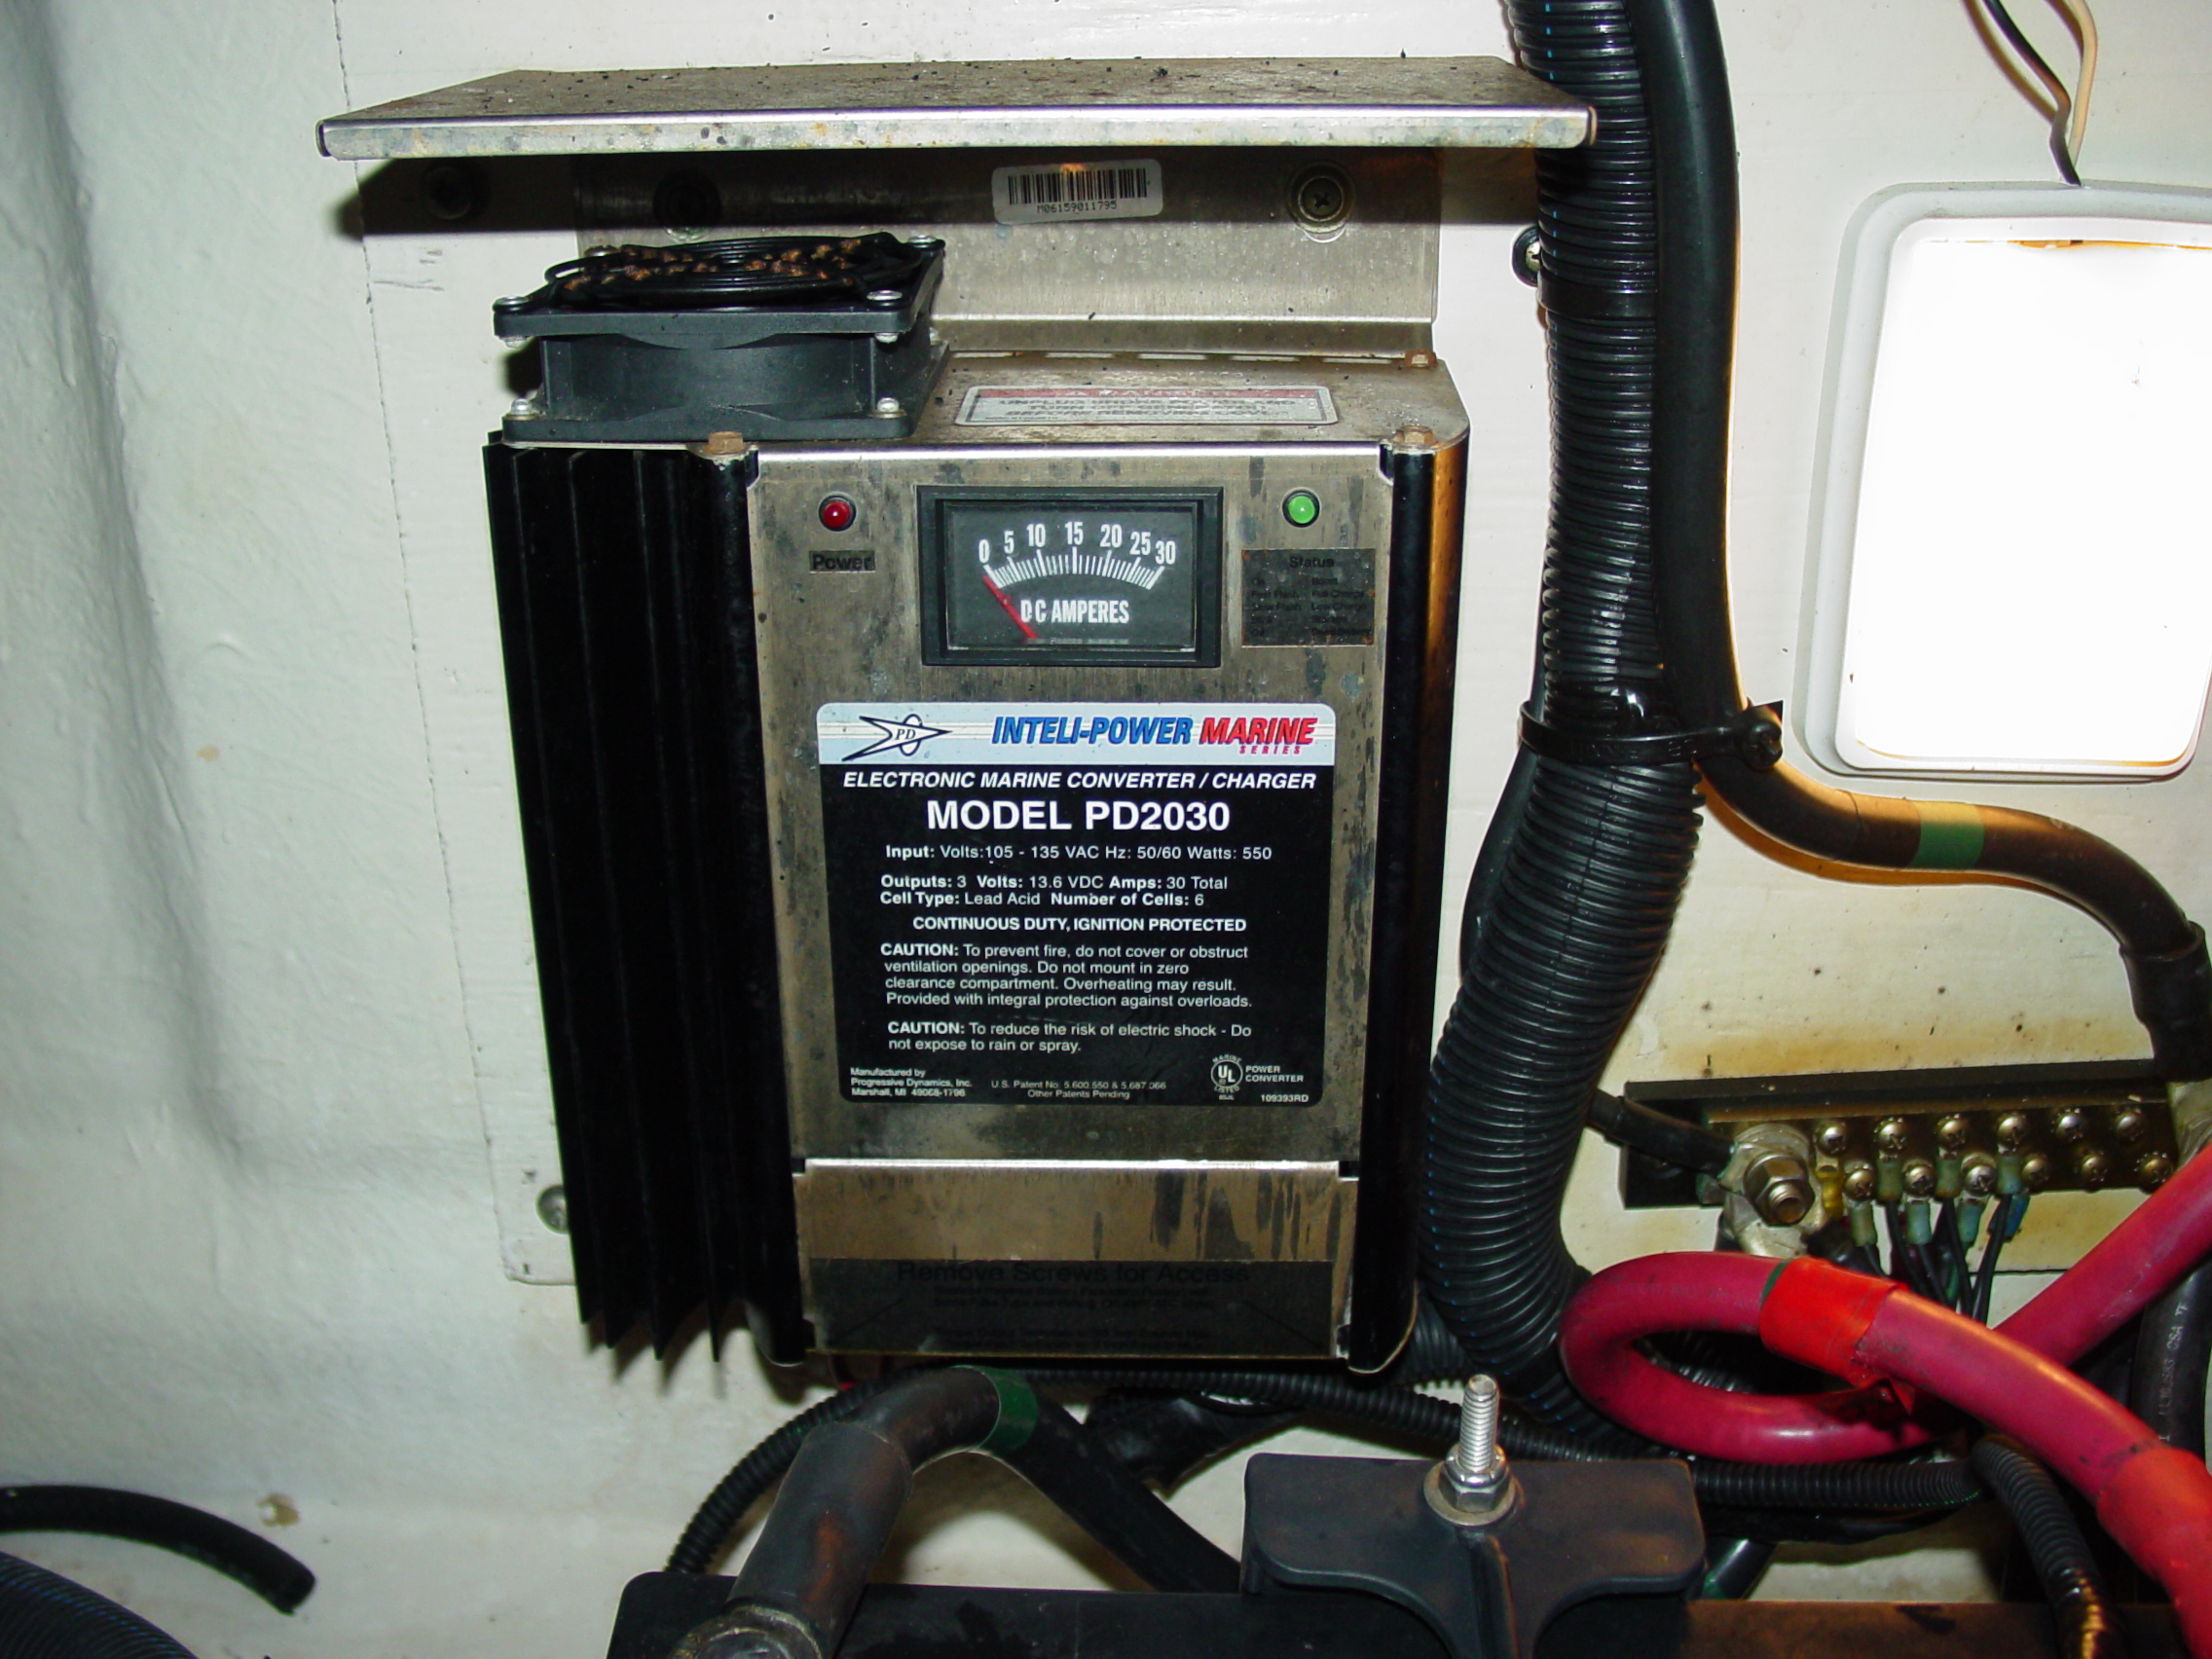
Figuring out where to mount a charger will be an exercise in compromise, so make sure to follow all manufacturer instructions when selecting a mounting location. The best option is a cool, dry area with good ventilation. A higher location is generally better than lower, as this typically provides better ventilation and protection from the corrosive humidity of the bilge. Also avoid high-temperature locations (such as an engine compartment) if possible, although this can be difficult on smaller boats with limited options.
For those considering installing the charger in a deck or cockpit locker, locate it as high as possible in a dry corner of the locker away from the hatch (to reduce exposure to water drips and spray). Many storage areas that battery charges wind up in have marginal ventilation at best. If that’s the case with an installation, help the charger breathe easier by not cocooning it with lifejackets, boat covers and other air blocking items. Adding additional locker vents (to increase air flow) may also be a good option.
Chargers should be installed as close to the battery or bank as practical. Shorter leads mean less installation cost, less voltage drop (which we’ll discuss in a moment) and increased charger performance over the life of the unit.
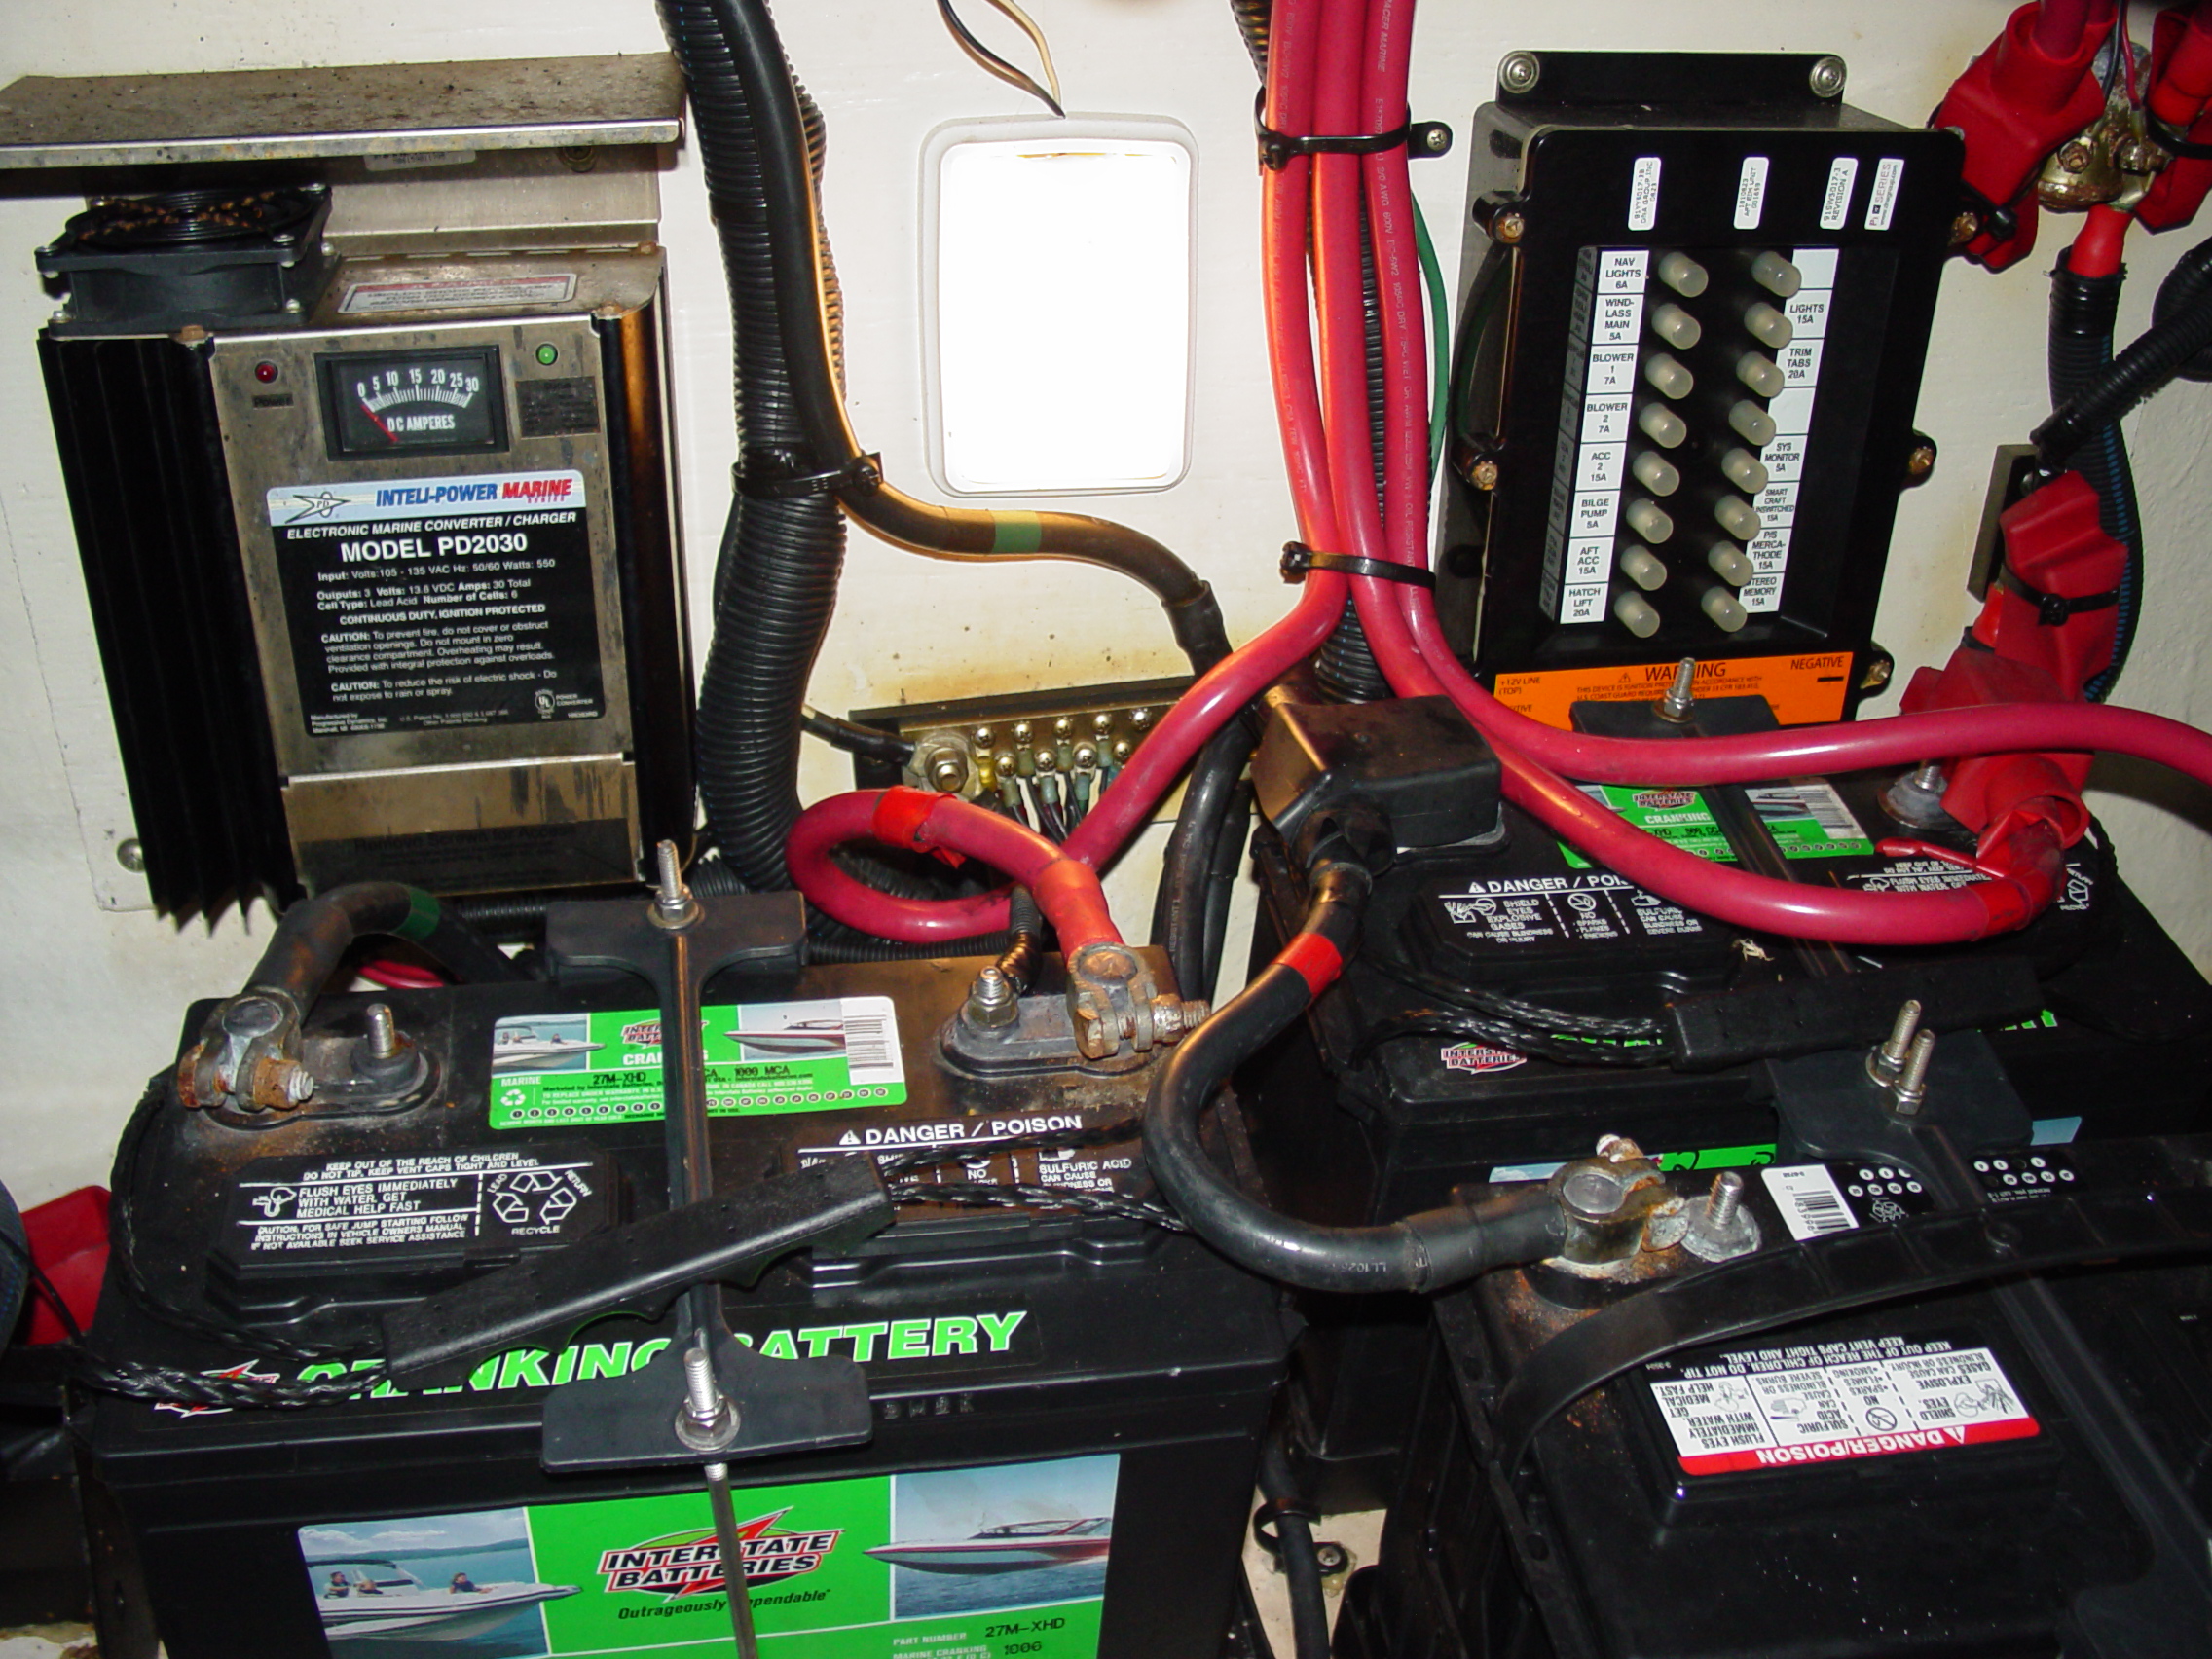
That being said, the charger should not be mounted directly over the batter or bank. Batteries (particularly liquid electrolyte or “wet cell” types) can produce corrosive gases such as sulfur dioxide while charging. These gases can quickly damage a charger if it is located directly above them. Another gas that’s produced when charging a lead acid battery is hydrogen. Hydrogen is not toxic, but at high concentrations is highly explosive (think the Hindenburg disaster). Yet another reason the charger should be ignition protected and located in a well-ventilated area.
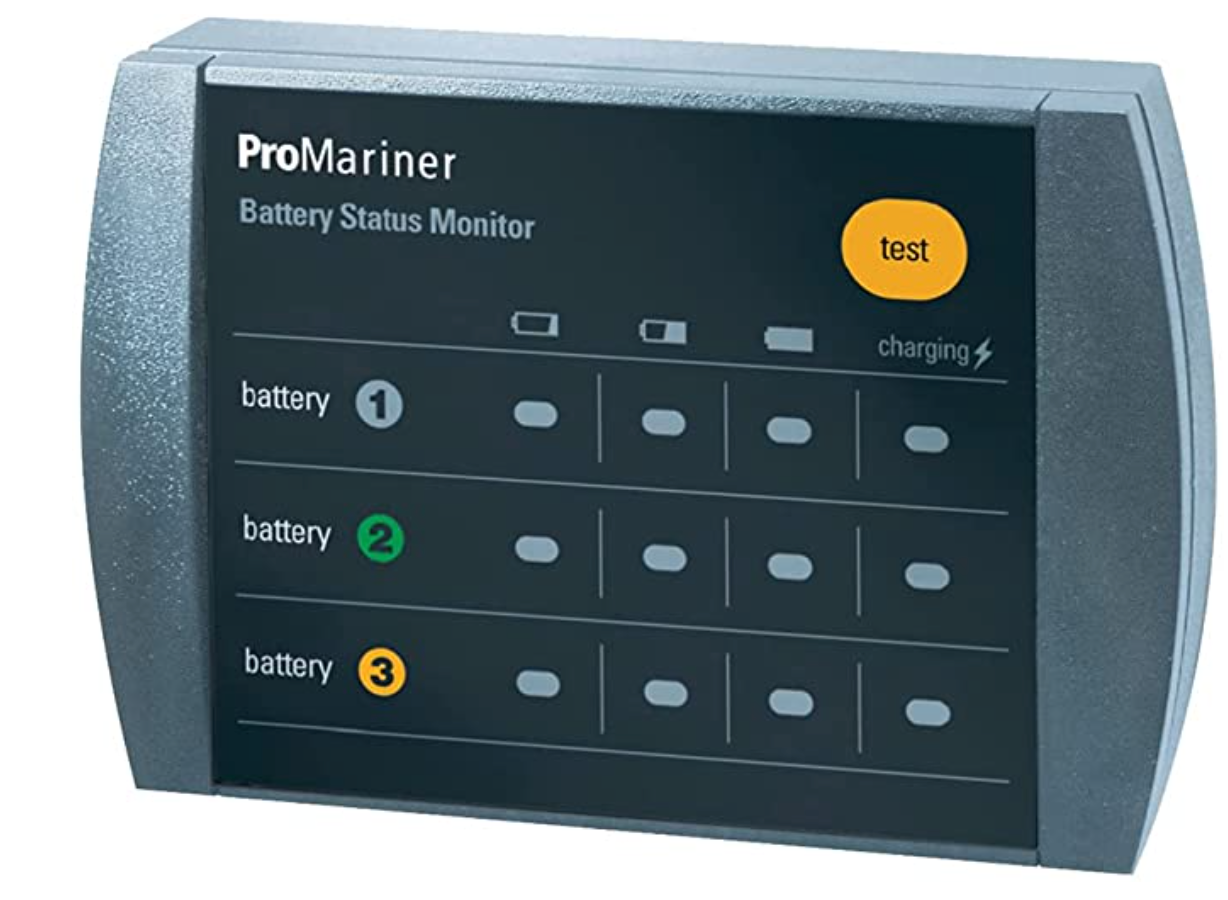
How About a Remote Display?
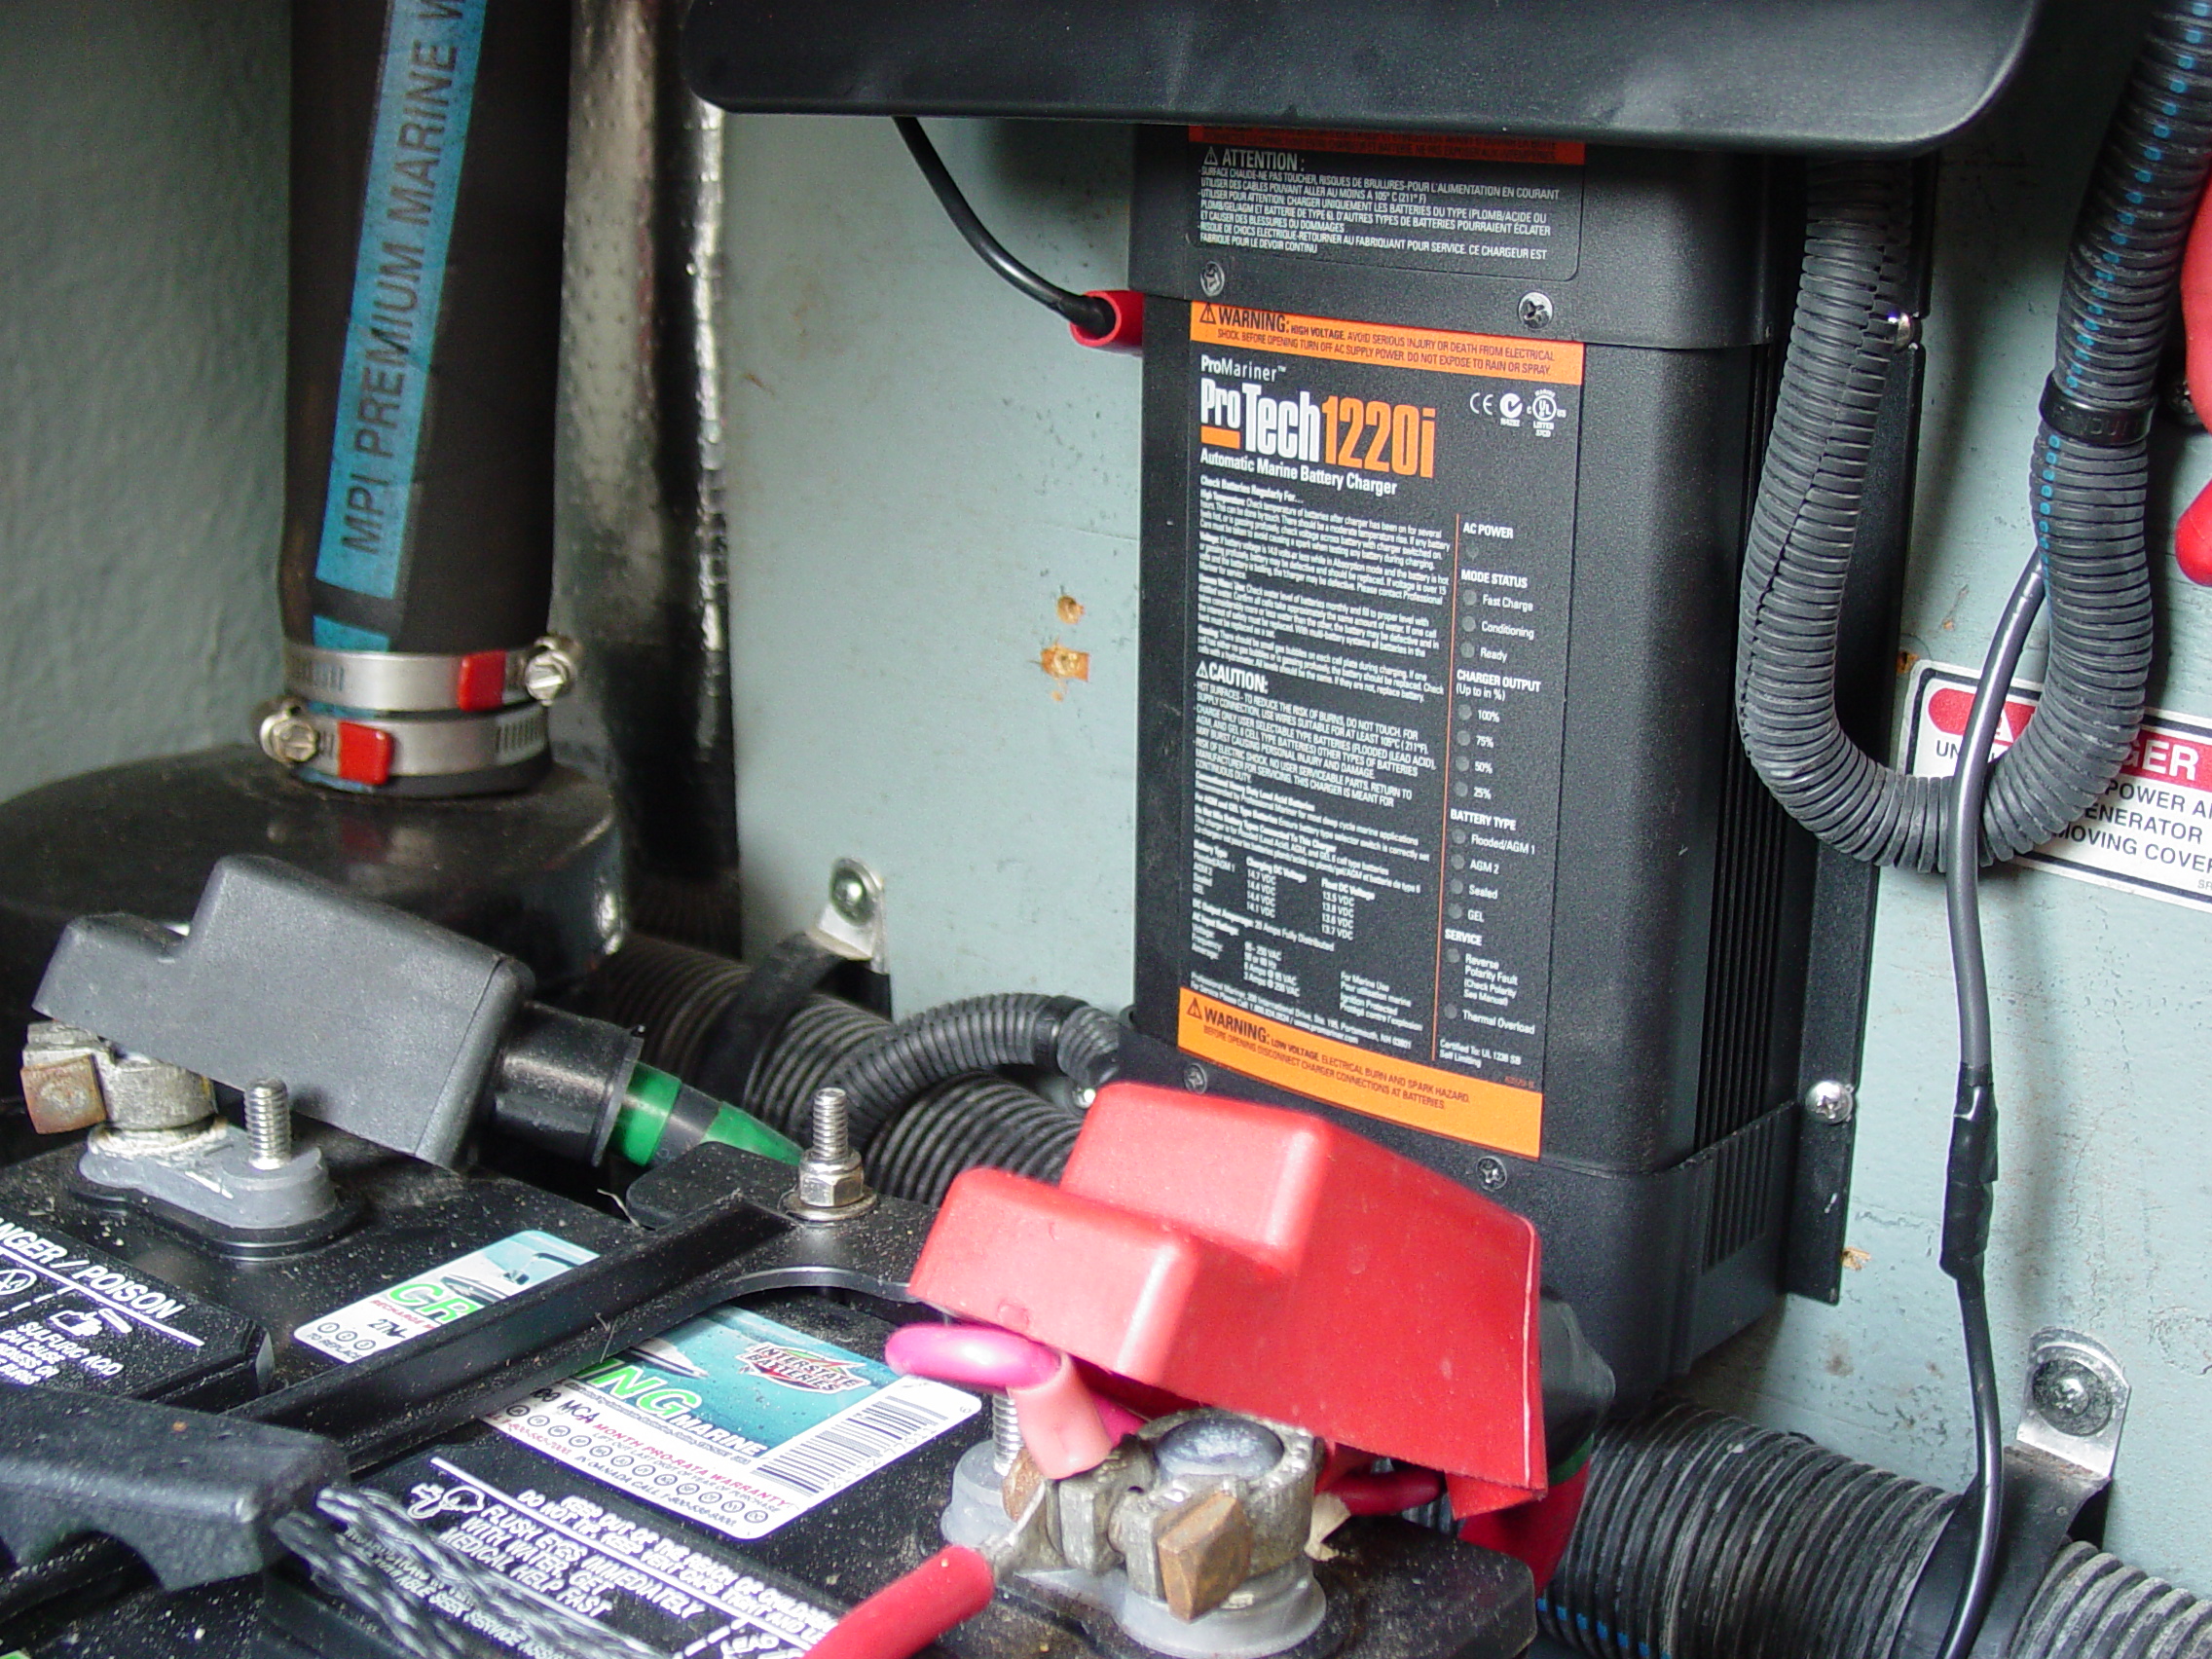
In most cases, a battery charger will likely wind up in out of the way location where it can’t be easily monitored. To address this out-of-sight dilemma, many new chargers offer a remote display option, another great feature to look for when selecting a charger. Remote displays can provide a wealth of information, however even the most basic units will provide all you really need — AC input voltage, DC output voltage, battery temps (if a sensor is installed), total charge time and current charge cycle information.
Installation of a remote display is pretty much a plug and play affair, typically consisting of four mounting screws for the display and a length of cable with phone jack style connections at each end.
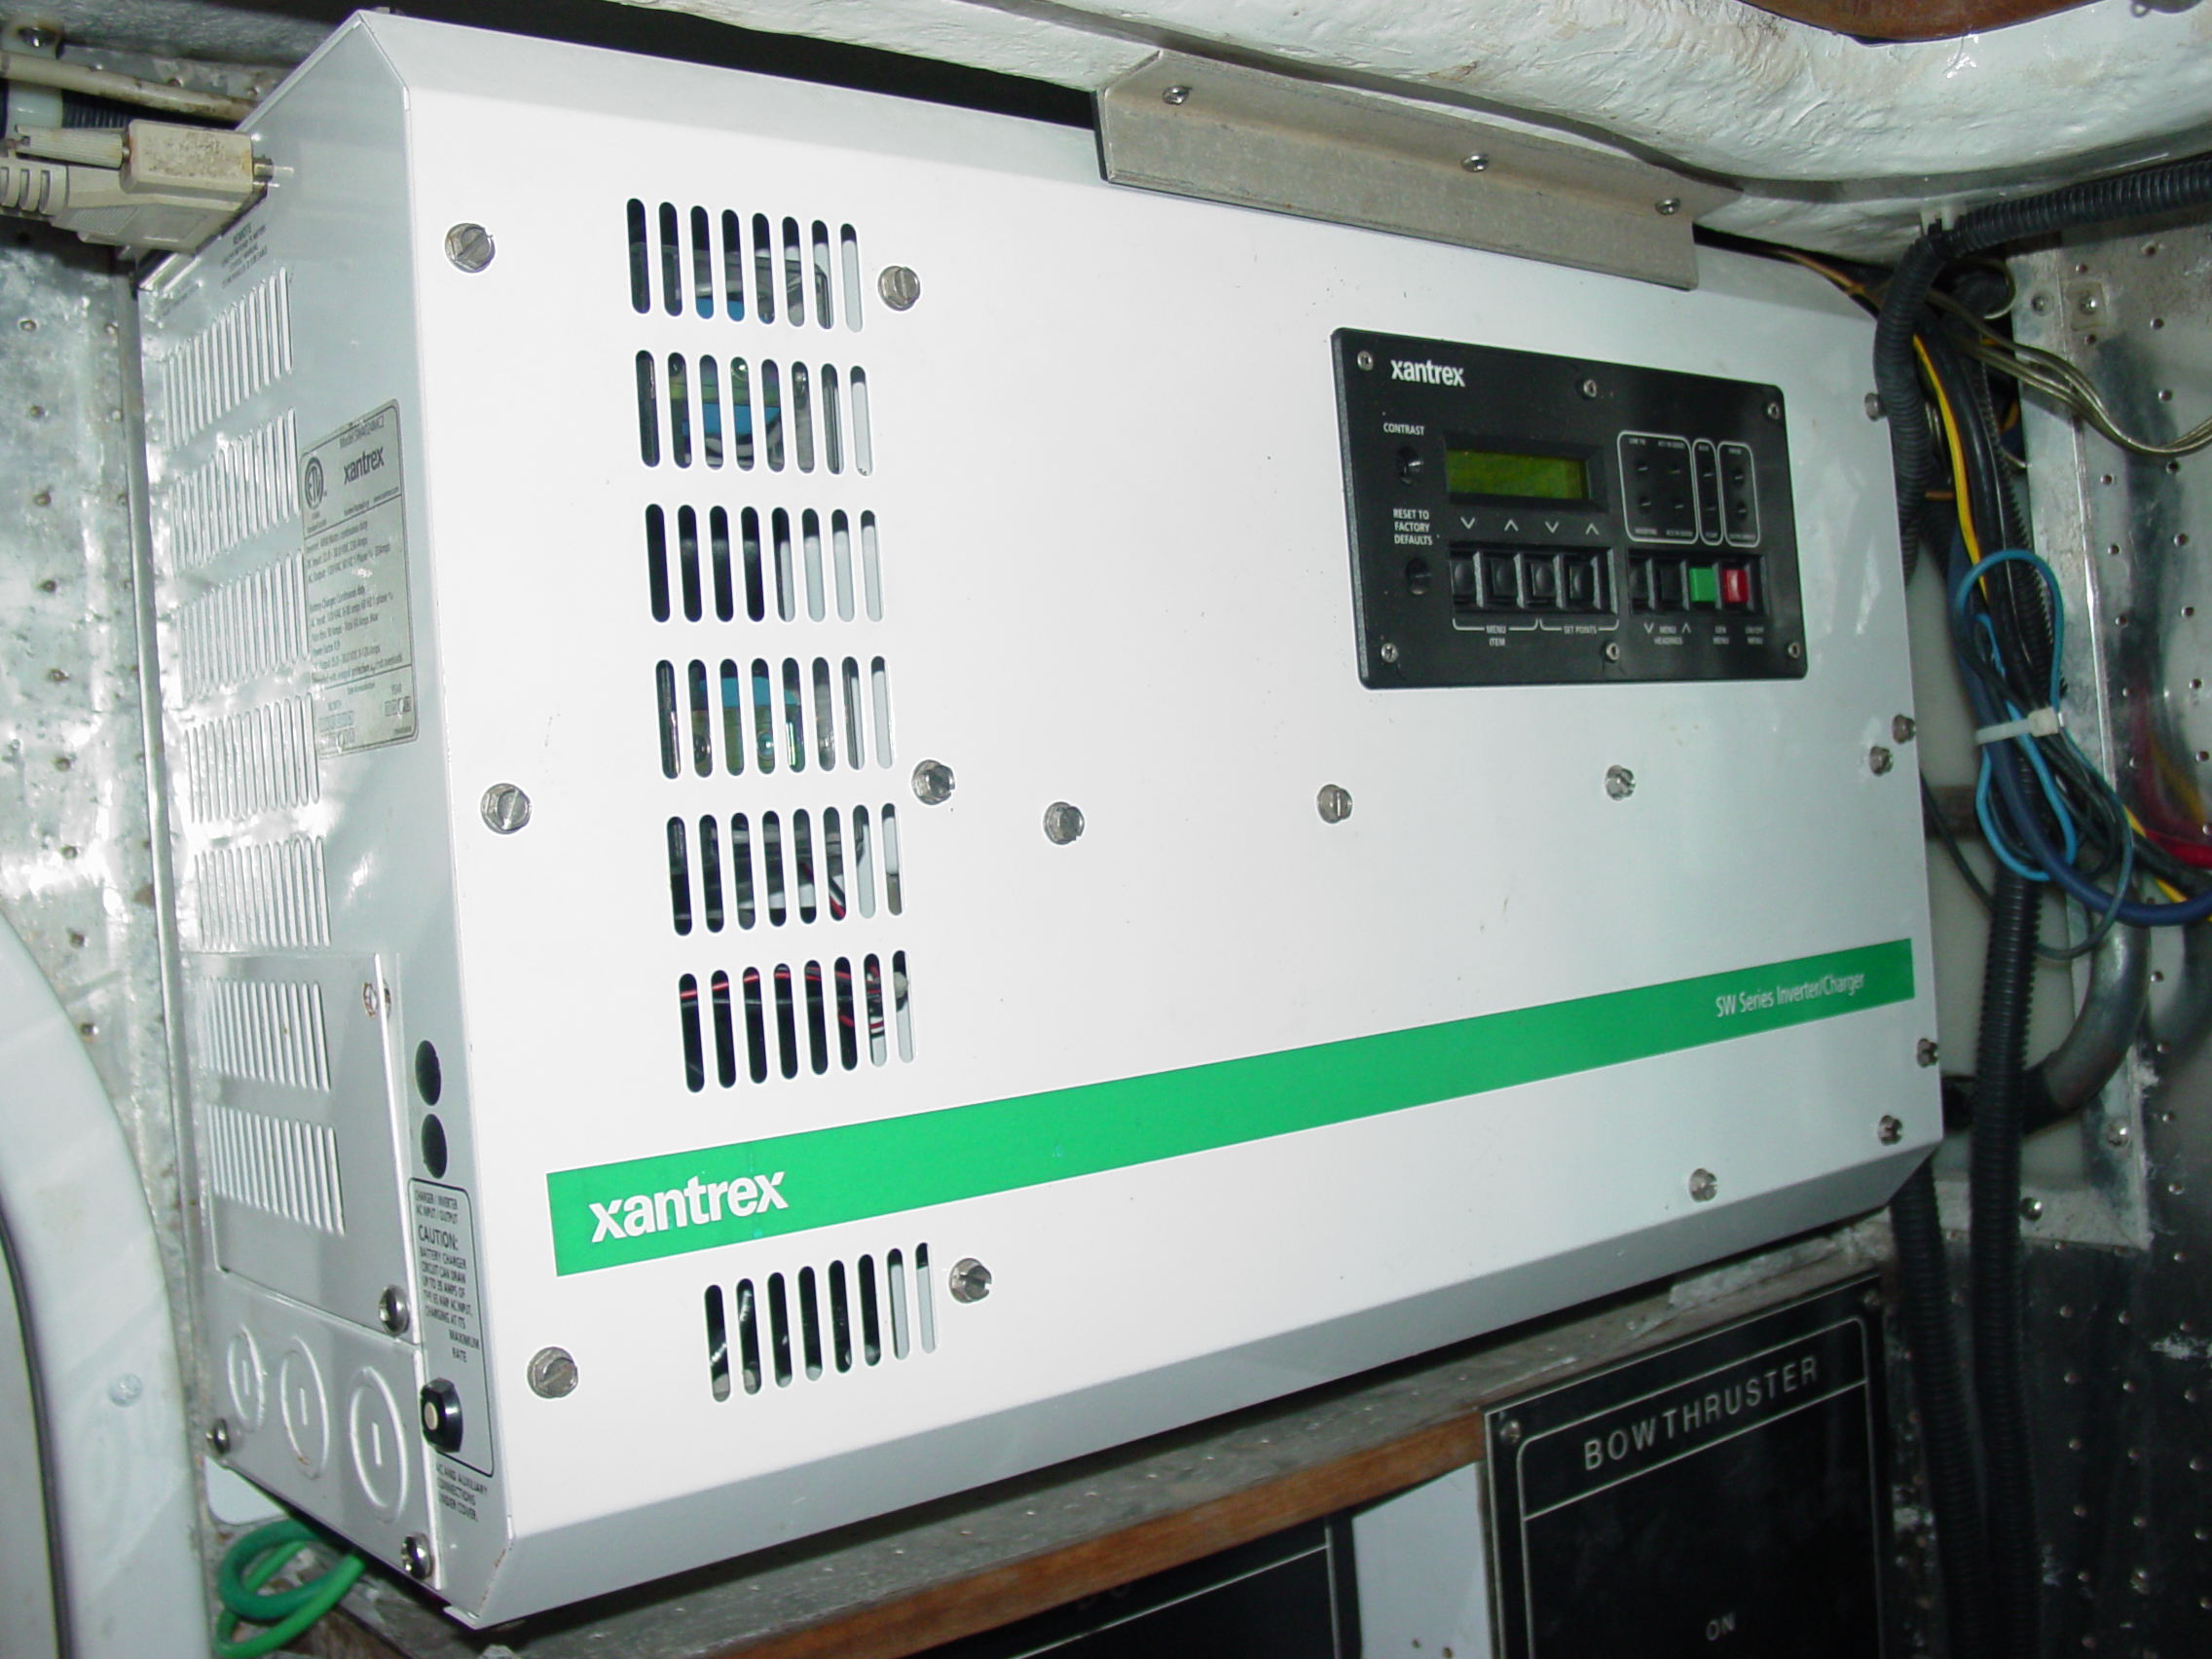
Mounting the Charger
Once a suitable spot is chosen, it’s time to mount the charger. For smaller chargers being mounted to a thick bulkhead or structure, screws are an acceptable option. If the charger weighs more than a couple of pounds, it should be through-bolted with suitably sized bolts, nuts and washers. Regardless of the mounting option, always use marine grade stainless steel for all mounting hardware.
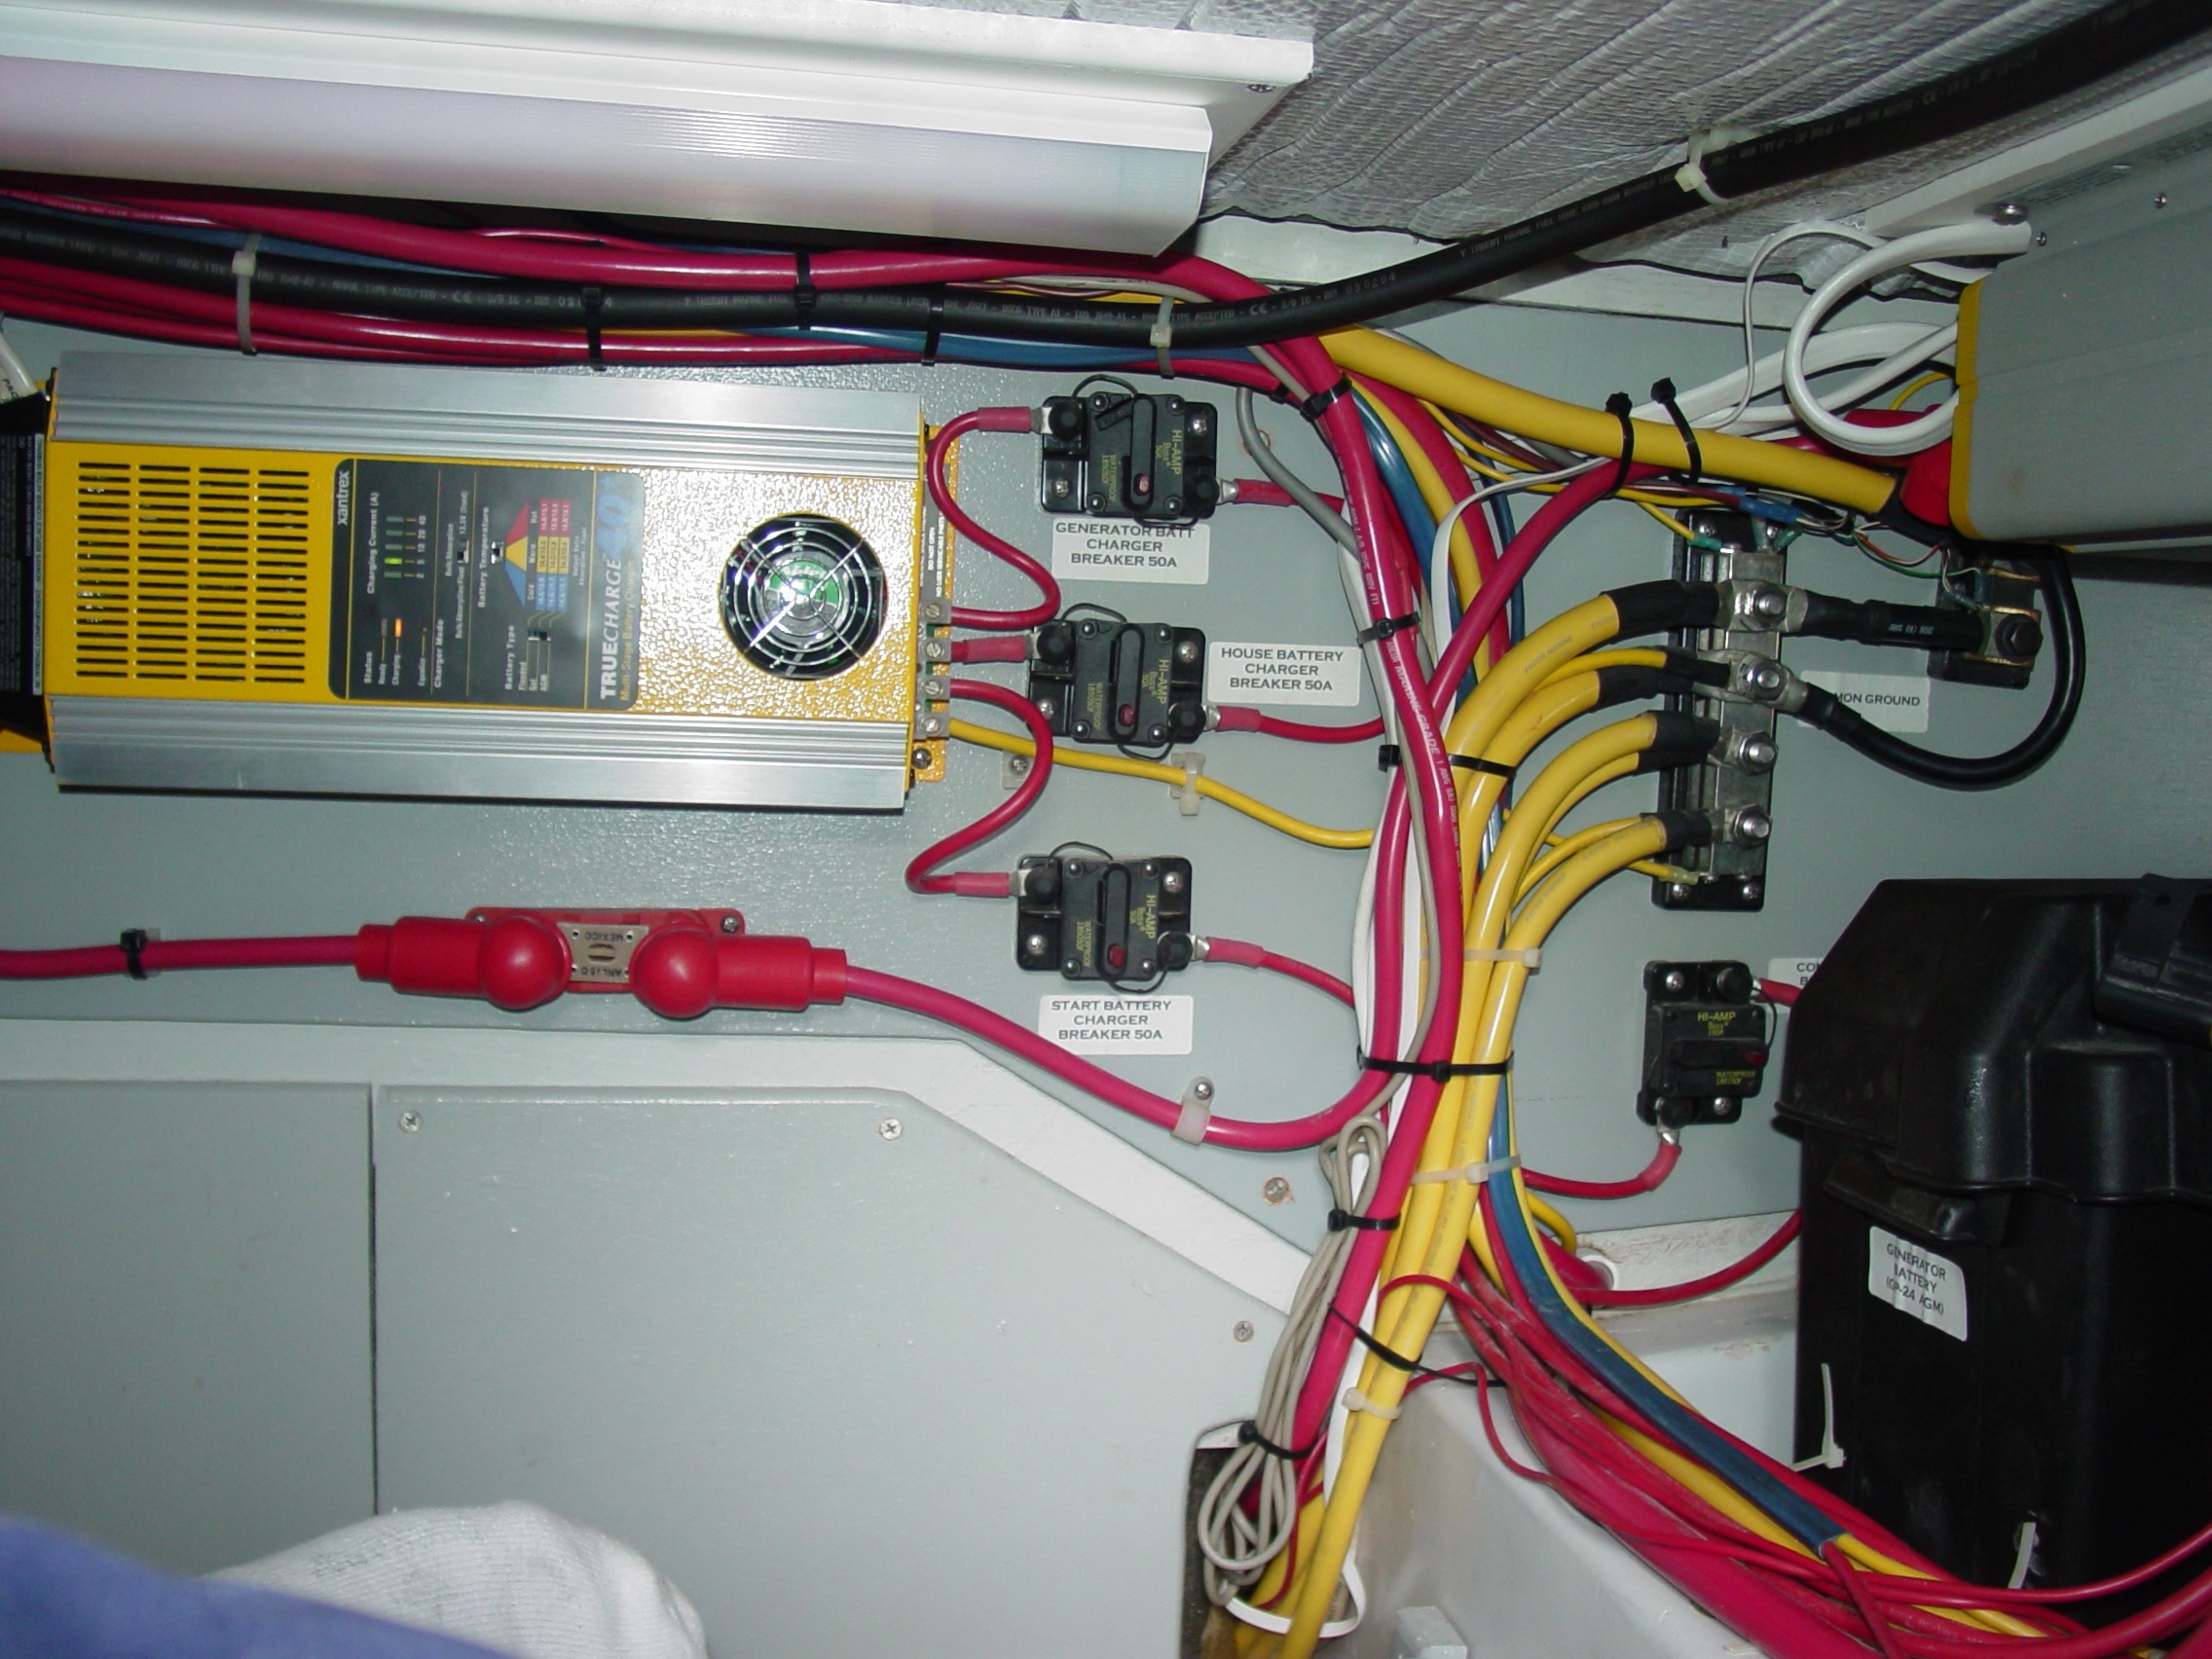
Getting Wired
Next up is connecting the charger, which involves installation of both AC (to power the charger) and DC wiring (between the charger and battery). DC wiring should be sized according to the manufacturer’s recommendations, which is based on the distance between the charger and battery. This measurement is “round trip” length (i.e. the full length of the negative and positive wires added together).
The longer the wire run, the larger diameter wire will be required to offset loss due to voltage drop (a loss of power resulting from the use of wire that’s too small for the run). Using smaller diameter wire than called for can decrease charge voltage at the battery and slow the charge rate way before the battery is fully charged, increasing charge time or actually preventing the battery from becoming fully charged.
Wire runs should be routed as direct as possible and provided support and chafe protection as needed. DC wiring connections should be made using marine grade waterproof ring terminals or butt connections. These are the ones that have a short length of heat shrink tubing to protect the termination once the connector is crimped and the heat shrink is activated.
If a wire-to-wire connection is required, always use a butt splice or connector. Never make connections using residential wire nuts or electrical tape. Both will eventually fall off due to vibration or age leaving exposed, energized wires.
When making charge cable to battery post connections, use closed barrel terminals where possible, sealing each with a small length of heat shrink to help protect them against corrosion. Place the charge cable terminals on top of the primary battery cable terminals, rather than beneath. This not only keeps the terminal where you can more easily monitor it for corrosion, but also raises it slightly above the top of the battery, helping to prevent spilled electrolyte from wicking up the wire and causing problems.
If the charger DC wire terminates in spring clamps or alligator clips (to make the battery connection) cut them off and replace them with proper, marine grade ring terminals. Finally, spray or coat all connections with a corrosion inhibitor (such as Boeshield T-9®) for added protection.
For smaller craft without a permanently installed AC system, hooking up the AC side can be as simple as plugging the battery charger into a suitable extension cord. For a more permanent install where the charger is the only AC powered item onboard, another option is installation of a grounded AC power inlet (such as the MARINCO 15A Battery Charger Inlet) which accepts a standard extension cord plug.
If your boat already has an AC system installed, plugging the charger in a convenient outlet (if one’s nearby) may be an option. If not, power it from the main AC distribution panel using marine grade, multi-stranded three-conductor AC wiring (no residential type solid strand wire please). Pick an unused circuit breaker of the amperage called for by the charger manufacturer (typically 15 to 20 amps) and connect per the instructions.
Practice safe wiring by making sure the AC shore power cord is unplugged at the dock, the main AC circuit breaker is off and that all AC power sources (including inverters and on-demand generators) are off and disconnected before starting any work.
When wiring, start from the supply AC side of things and work toward the battery, making the connections at the battery the final step. This is a safety strategy that minimizes exposure to energized circuits (i.e. DC power from the battery) assuming of course power to the AC system is turned off as discussed previously.
Firing It Up
When all the connections have been made (and with the AC power off) make the final charger connections to the battery and verify the installation is complete. Review the entire installation, checking that all connections are tight, all wiring is properly supported (with appropriate chafe protection) and that everything is installed as per the charger manufacturer’s instructions.
But wait — don’t turn anything on just yet. First, check that the battery charger is set for the type of battery you have installed (flooded, gel, AGM, etc). Next measure the voltage of your battery with a multimeter prior to the charge cycle — this gives you a good reference point to start with, and will also be handy later on if battery issues develop.
Now you can plug in the shore power cord, energize the main breaker and then the appropriate branch circuit breaker to power up the battery charger. Once the battery charger is powered up, check the battery voltage level. It should be greater than the reference voltage you took earlier and in fact should begin to rise as soon as you power up the charger.
Finally…
Don’t simply power up the charger, call it good because nothing caught fire, then head home for your favorite Barcalounger and a can of Old Milwaukee. Once the battery charger is powered up and running, stay onboard to observe at least the first few hours of operation. Hang around long enough to verify that when the batteries are fully charged, the charger transitions from the initial charging mode to a maintenance level float-charge.
By Capt. Frank Lanier
Captain Frank Lanier is a SAMS® Accredited Marine Surveyor with over 40 years of experience in the marine and diving industry. He’s also an author, public speaker, and multiple award winning journalist whose articles on seamanship, marine electronics, vessel maintenance and consumer reports appear regularly in numerous marine publications worldwide. He can be reached via his website at www.captfklanier.com.